
 |
| Credit: beefy_n1 |
Got a new router? You'll want to set it up then. You'll just get the device out, open up the manual, pop in the disk and follow the instructions. You'll have it set up in no time! But what if the router you've got is a refurbished one without a disk? What if you're setting it up for a friend who has lost the disk? Or maybe you are just feeling geeky and want to set it up on your own, without the CD?
Here's the guide you've been looking for! And P.S. Why are you setting yours up without the CD? Hit me in the comments!
This article has been written with Linksys screenshots, because the brand is so popular. It won't be very much different for other brands. Even if you don't have a Linksys wireless router, feel free to read this article. You will find it helpful too! I have generic instructions and resources for other brands throughout the article.
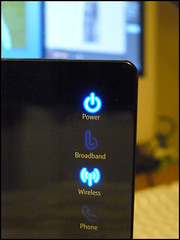
The cables
 |
| Credit: Home-Network-Help.com |
The first step, surely in this process is setting up and connecting the hardware. It's simple. Here's the basic structure in a wireless router setup:
- You get the connection via a cable/DSL/ADSL modem.
- The ethernet (network) cable from the modem goes into the Internet port of your router (marked yellow on Linksys routers).
- Router broadcasts wirelessly to Wi-Fi enabled devices in the house.
- Those computers that do not have Wi-Fi capability connect to the router through ethernet cables.
Start by connecting all your hardware like this. Then we'll set your network up.
The settings
 |
| Credit: * Jerry * |
If you're lucky enough, your network should have an Internet connection automatically and you can configure the settings as I am explaining further on. But if it doesn't work, move on to the further section where I'll be troubleshooting this, and then come back.
After you have connected, go ahead and open a web browser. In the address bar, type in 192.168.1.1. If you are doing this right now, you can click this link! This is the default IP address of your new Linksys router. For other brands, it may be slightly different, for example 192.168.0.1 or 192.168.100.1. Look your model up online. But at least at the time of this writing, all Linksys routers have 192.168.1.1 as their default address.
You will be asked for a username and password. Because it is a new or at least newly reset router, you haven't changed it. So if it is a Linksys router, leave the username blank and type in admin as the password. For other brands, check out this site. It's a huge, searchable database.
When you have done this, you will get a setup page that looks similar to this:

To change your network's name (SSID), go to the Wireless tab. Here, change Configuration View to Manual. Here, rename linksys to whatever you like. You can set the network mode to in these settings too. If your router supports it, and if you have devices that are capable of wireless-N, go ahead and set the mode to that. It's the fastest. Otherwise wireless-G is fine. Most devices support it and it is quite fast too. If you have old computers/phones in your house, I suggest BG-Mixed. Wireless-B is old, but you get the legacy support, and your newer devices can use wireless-G, which is better.

If you are not directly connected to the router, you might get disconnected after changing the SSID, as your computer will think that the 'linksys' network has disappeared. Now you need to look for the newly renamed network and connect to it.
Now, let's set up the security for the network. Those who will connect to the network will need to enter a password. This is different than your router's password which you enter to get to these settings. You don't even need to change that once you have set the network's password. If people won't even be able to connect in the first place, they can't access the settings. But the people in your house, who know your network's password will be able to enter the default password and get to the settings, so it is recommended to change it. I'll show you how in a while.
In the Wireless tab, go to Wireless Security. I recommend using the strong WPA2 Personal encryption, because it works with most devices, while giving you optimum security. Do NOT use WEP, because it is very easily hackable and you can even find loads of free tutorials online demonstrating it.

Just choose WPA2 Personal from the drop-down and set your password. Don't change any other setting. It's not needed. Save the settings. You now have a password protected network.
If you are not directly connected to the router here too, you may get disconnected. You will need to reconnect to the network, and type in the new password this time, when prompted. If you are using Windows Vista or Windows 7, go to Connect To and right-click the network, then select Properties. Now configure the security settings for the network on your computer. If you have typed the right password, you will be easily able to connect to the wireless network now.
The next step is to secure your router's settings. You don't want your non-geek family members messing around this browser-based router interface. To set up the router password, go to the Administration main tab. Here, just edit the Router Password and retype it. Save the settings, and you're good to go!
Congratulations! You have set the router up! You have a functioning wireless Internet connection in your house, that is completely secure! You can now surf the web and play online games from anywhere in your house. And it did not even require the disc that everyone needs to do this.
What if you don't get the Internet connection?
If you came here from the first section, then yes, this is the section you are looking for. But this may also happen after you have set the network up. No problem. This does not require the resetting of the router once again.
The main reason why this could happen is that the IP addresses of the modem and router are conflicting. Many DSL modems come with the default IP address of 192.168.1.1, and if the router also has the same address, your connection may not work. The solution? Just change the IP address of the router!
Go to the Setup main tab again. Scroll down. Find the entry labelled Local IP Address. Change the address to something else, maybe 192.168.0.1. Save the settings and reboot the router, and everything may start working normally.
Now you have set the router and your new wireless Internet connection up. Congratulations! Any problems? Or just a comment? Did you find this useful, or not? Why are you setting up your network without the CD in the first place? Hit me in the comments!
See also:
Sit around airline lounges for free Wi-Fi - Travel Tip
Beginners' Guide to BitTorrent
Fix a bricked router by hard resetting it
Beginners' Guide to choosing a DNS server for faster web browsing
VLC Media Player Santa hat easter egg!
Remember to subscribe!